# IT

The IT department is responsible for maintaining and developing CLIC's IT infrastructure. Website, IT tools, access, crazy projects... it's a rich department, full of tinkering and poorly formatted commits.

By joining this departement, you'll reduce your chances of skin cancer, but you'll lose 0.5 to each eye by working in the dark like crazy people.

<span>This wiki is aimed at system administrators and developers, rather than users. It provides an overview of what's done and what needs to be done in the cluster, as well as the keys to understanding how. Please also refer to the various repositories on </span>[GitHub](https://github.com/clicepfl).

We use a lot of technologies, and here's a non-exhaustive list:

- [Docker](https://docker.com)<span> (server)</span>
- [Ansible](https://docs.ansible.com/)<span> (server)</span>
- [Typescript](https://www.google.com/url?sa=t&source=web&rct=j&opi=89978449&url=https://www.typescriptlang.org/&ved=2ahUKEwipj-O9iJWGAxWGywIHHcYWBMwQFnoECAYQAQ&usg=AOvVaw0CNxTP-CKE5ss0r3aWazpGhttps://www.typescriptlang.org/)<span> (web)</span>
- [NextJS](https://nextjs.org/)<span> (web - frontend), </span>[Tutorial](https://nextjs.org/learn)
- [React](https://react.dev)<span> (web - frontend), </span>[Tutorial](https://react.dev/learn)
- [Rust](https://doc.rust-lang.org/book/)<span> (web - backend), </span>[Tutorial](https://doc.rust-lang.org/stable/book/)

# IT Onboarding

Are you a fresh recruit of CLIC or one of it commissions ? You're in the right place. Here is a little overview of our IT tools and how you can get started.

We also recommend you have a look at [Outils informatiques](https://clic.epfl.ch/wiclic/books/presidence/chapter/outils-informatiques) for more details on some tools we have at CLIC.

## KeyCLIC

This is our SSO, that grants you access to most of our services. The first step is to request that an IT committee member of CLIC creates a KeyCLIC account for you. Then, you can access your account at [https://clic.epfl.ch/me](https://clic.epfl.ch/me).

Typically we set your default password to your email address, and you will be required to change it and validate your email the first time you log in. If the default password doesn't seem to work, you can simply clic on Forgot Password and follow the steps to create a new one.

## NextCLIC

NextCLIC is a drive that hosts all of our files, and allows you to edit them online thanks to integration with OnlyOffice. You can access this at [https://clic.epfl.ch/nextcloud](https://clic.epfl.ch/nextcloud), login in with your KeyCLIC account.

> **Massimo's Pro Tip:** The NextCloud mobile app isn't very useful (you can simply access NextCloud through a browser), however I recommend the **OnlyOffice Documents** app, which you can connect to NextCloud in order to edit documents from your phone !

## Matrix / Element

Our official communication typically goes through our Matrix instance. This is essentially our messaging app for working on CLIC projects. We recommend installing the relevant apps on your laptop and phone, most of us use [Element](https://element.io/download), which is available everywhere (Windows/macOS/Linux, Android/iOS, Web). There are other [Matrix clients](https://matrix.org/ecosystem/clients/) you can also use, but make sure they support the same things, for example some don't support threads. You can also access your messages without an app on [Element Web](https://app.element.io/).

The URL to use to connect to the CLIC server from the app is : **https://clic.epfl.ch**  
From there you should be able to connect using your KeyCLIC account

There are a few additional steps you should take once you're logged in, such as Secure Backup and Device Verification. Checkout the [Element User Guide](https://element.io/user-guide) for more information.

Once you're all set up, don't forget to let the IT team know so we can add you to the relevant channels !

## Vaultwarden

This is where all the passwords related to CLIC are stored. Unfortunately, this is one of the few services we have that we could not link to KeyCLIC, so you need to be invited by someone who already has access. You can then create a master password as well as 2FA, which you will use each time you need to log in. The Vaultwarden is accessible at [https://clic.epfl.ch/armoire](https://clic.epfl.ch/armoire), but if you use Bitwarden as your password manager, you can also add you CLIC Vaultwarden account as an additional account, which makes it easier to automatically fill in passwords as needed on your browser and smartphone.

## WiCLIC

This is the Wiki you are one right now ! Here you can find plenty of information about the events of CLIC and how we function, and even add to this knowledge base yourself, by logging in with your KeyCLIC account. You can come back here when you need to at [https://clic.epfl.ch/wiclic](https://clic.epfl.ch/wiclic).

## Directus

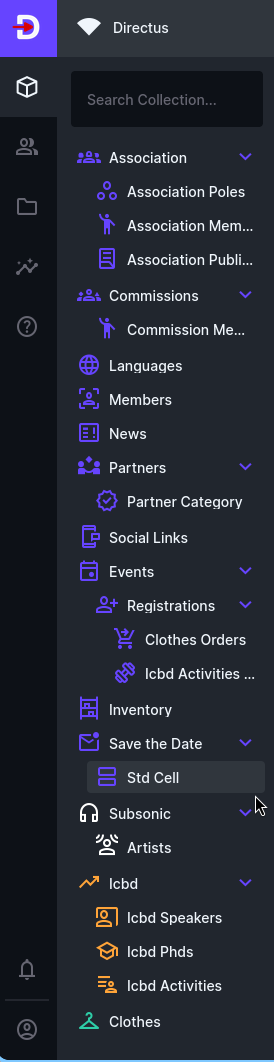
This is our database: here you can find all of the data that is published on the website, as well as our inventory. This will be particularly useful for you if you are in charge of Communication, since you can write news article for the website directly from here, and if you are in Logistics and need to check the inventory. Obviously, you will become quite acustomed to this as well if you are in charge of IT. You can find it at [https://clic.epfl.ch/directus](https://clic.epfl.ch/directus). See also [this page](https://clic.epfl.ch/wiclic/books/common-knowledge/page/mettre-a-jour-sa-page-web-clic) on how to update it.

## Website

This is where anyone can find out more about CLIC. It has all of our events and news, as well as links to our social media. You can find it at [https://clic.epfl.ch/](https://clic.epfl.ch/)

## CrabCLIC

Have you ever used [Crab Fit](https://crab.fit/) to see when everyone is available for a meeting ? Well we have our own exactly the same but prettier version at [https://clic.epfl.ch/crabfit](https://clic.epfl.ch/crabfit).

## Boîte Mail

Une fois que l'administration de l'EPFL vous aura officiellement adoubé, vous pourez accéder a votre boîte mail CLIC de pôle.

- Ouvrez votre boîte mail perso
- Cliquez sur votre profil en haut a droite
- Selectionner "Open another mailbox"
- Ecrivez la boîte mail que vous voulez ouvrir et cliquer sur Open
- Si vous y avez accès, elle devrait s'ouvrir ou vous devriez voir un lien qui permet de l'ouvrir

Le addresses mail ont le format pole.clic@epfl.ch, par exemple communication.clic@epfl.ch.

## GitHub

If you want to see more about all the IT things we have at CLIC, you can check out our [GitHub](https://github.com/clicepfl) !

# Server

The server is hosted in the Lys data center at EPFL. Due to legal limitation on EPFL's side, it is fed a direct connection to the ISP, and thus is not on the school's network. Accesses to the server room can be requested through the AGEP's IT manager which is responsible for the managment of the rack.

It can be accessed by ssh through the user `clic-admin`, below is a corresponding `.ssh/config` entry. Key management is done through the `init.yaml` playbook on the [infra repo](https://github.com/clicepfl/infra).

```
Host clic
  HostName clic.epfl.ch
  User clic-admin

```

## Connectivity

The connection is provided by [Saitis](https://saitis.net/), along with an IPv4 (`62.220.153.185`) and an IPv6 subnet (`2001:788:f185::/48`) exposed onto `2001:788:153:a:185::2/80` (**important**: the IPv6 subnet is not yet setup on the server). It uses the port 35 of the Saitis switch. The current [netplan](https://netplan.readthedocs.io/en/stable/) config, `/etc/netplan/static.yaml`, is shown below and can be deployed using `netplan generate && netplan apply`.

```yaml
network:
  version: 2
  renderer: networkd
  ethernets:
    enp7s4:
      addresses:
        - 62.220.153.185/24
      nameservers:
        addresses:
          - 8.8.8.8
      routes:
        - to: default
          via: 62.220.153.1
          metric: 200

```

## Physical access

The server is stored in the [Lys datacenter](https://plan.epfl.ch/?room==MA%20B0%20453), rack 19, slots 9-11. It can be accessed at anytime, although the security staff sometimes locks the room after 9PM. Obviously, make sure that everything is in place when leaving the room: both front and back panel of the rack are closed, screens is put back on the right of the entrance (there are marks on the ground), etc.

The datacenter provides screens and keyboards, so no need to bring yours. Note that the server's USB ports are quite capricious, you should use the ones directly below the ethernet port to avoid most issues. The server can be power buttons (red: start, black: reset) are within the case and can be reached from the back using a pen.

## Infrastructure

Infrastructure configuration is on the [Clic Infra](https://github.com/clicepfl/clic-infra) repository. Each service is hosted as a [Docker](https://www.docker.com/) stack. This makes it easy to add new services without worrying about dependencies, architecture, etc. Updating the server when the configuration has been modified is done using the [Ansible](https://www.ansible.com/) tool.

### Add/Remove/Modify a service

Modifications to the infrastructure must first be made on the infra repository, then applied to the server using Ansible (see below).

Each service is configured via a `docker-compose.yaml` file ([doc](https://docs.docker.com/compose/compose-file/compose-file-v3/)), in a role unique to the service. Services generally never communicate with each other, except via their exposed APIs (e.g. the website accesses Directus via its public url, not via a dedicated virtual network). If a service requires a database, it is instantiated in the same stack as the service and is exclusively dedicated to it.

> **Warning**: stacks must be modifiable with a simple `docker stack deploy`; don't use `config`, as these are immutable. The stack would have to be removed and then redeployed, which is a pain. Instead, configure services via their environment variables.

If the service needs to be accessible via the Internet, it must expose one or more ports. As of now, all ports of the machine are accessible, but this should be changed for security reasons.

Once everything is setup and pushed on the `clic-infra` repository, use `ansible-pull -K -U https://github.com/clicepfl/clic-infra.git -e @/var/secrets.yaml deploy.yaml -e SERVICES=<new-service>,webhook -e WH_BUILD=false` on the server. The webhook needs to be reconfigured in order to allow redeployement requests for that service.

### Secret management

Services may require private (or server-specific) information, such as an admin password, or a mailbox password. These values are stored in a `secrets.yaml` file (located at `/var/secrets.yaml`), and loaded by Ansible during deployment. They must be referenced in the service role argument list (`roles/<service>/meta/argument_specs.yaml`) passed as environment variables to the stack deployment task (`roles/<service>/tasks/main.yaml`). They can then be retrieved from each stack's configuration using the syntax `${MY_SECRET}`.

### Deployment

Deployment is carried out using the playbook `deploy.yaml`, which deploys the stacks referenced in the `SERVICES` variable (using a comma separated list), or all if the variable is empty/undefined. Although ansible is designed to run playbooks on other machines, this one must be ran from the server itself to be able to properly access the secrets file. The `WH_BUILD` variable controls whether the webhook needs to be rebuild, if set to false the hook will only be reconfigured.

Example:

```sh
# Deploy nextcloud
ansible-pull -K -U https://github.com/clicepfl/clic-infra.git -e @/var/secrets.yaml deploy.yaml -e SERVICES=nextcloud

# Deploy the website and directus
ansible-pull -K -U https://github.com/clicepfl/clic-infra.git -e @/var/secrets.yaml deploy.yaml -e SERVICES=website,directus

# Build and configure the webhook
ansible-pull -K -U https://github.com/clicepfl/clic-infra.git -e @/var/secrets.yaml deploy.yaml -e SERVICES=webhook

# Configure the webhook without rebuilding it
ansible-pull -K -U https://github.com/clicepfl/clic-infra.git -e @/var/secrets.yaml deploy.yaml -e SERVICES=webhook -e WH_BUILD=false

```

The `-K` arguments forces the command to ask for the `BECOME` password, i.e. the password for `sudo`. This is required as some services like Caddy or the webhook requires root access to be redeployed.

### Backups

Backups are managed by [BorgBackup](https://www.borgbackup.org/), enabling encrypted, incremental backups. The [Borgmatic](https://torsion.org/borgmatic/) tool, configured by Playbook `deploy.yaml`, periodically generates and uploads backups. Its configuration (also in the Playbook) must be updated whenever a service is added/removed/modified.

To manually create a backup, you can run `sudo borgmatic` (ideally in a detached screen `screen sudo borgmatic`, since it takes several hours to complete). You can inspect the backup repository using the [`borg`](https://borgbackup.readthedocs.io/en/stable/) CLI tool.

## Installation

In the event of a complete server reinstallation, here are the steps to follow:

1. Use the init playbook: create an inventory on your computer (see the [docs](https://docs.ansible.com/ansible/latest/inventory_guide/intro_inventory.html)), then `ansible-playbook -i <inventory> <path/to/init.yaml>`.
2. SSH into the server.
3. Set up the `/var/secrets.yaml` file (see [the example]((https://github.com/clicepfl/clic-infra/tree/main/secrets.yaml.example)) in the infra repo). Move the database dumps to the directories set in this file. If you do not have access to the Directus tokens, use a stub.
4. Generate an SSH key for the default user an one for `root` and save both in the deployment keys of the [infra repository](https://github.com/clicepfl/clic-infra/settings/keys).
5. Launch the stacks with Playbook `deploy.yaml`: `ansible-pull -U https://github.com/clicepfl/clic-infra.git -e @/var/secrets.yaml deploy.yaml`.
6. Check the databases content, using `docker exec -it <container-name> bash` then either `psql -U <user> <database>` or `mysql --user <user> -p`. The dump is present in `/docker-entrypoint-initdb.d/<smth>.sql` and should already be applied; if its not the case it can be piped into the database connection command shown previously: `psql -U <user> <database> < /docker-entrypoint-initdb.d/init.sql`.
7. Stop all the services (`docker stack rm <stack list>`, using `docker stack ls` to list the stacks).
8. Copy/Move the file content in the volumes (stored under `/var/lib/docker/volumes/<volume-name>/_data`), after having remove the content placed by the first run of each service. Skip database volumes (already initialized).
9. If needed, regenerate token for Directus and set them in the secrets file.
10. Restart all the services using the playbook `deploy.yaml`.

Everything should be set now !

## Webhook

The webhook is a systemd service running on the server baremetal (i.e. not in a container). It allows GitHub to redeploy some services, for example when a new version is available. It is exposed on the port 4000.

For more detail, see the dedicated [README](https://github.com/clicepfl/infra/tree/main/roles/webhook/files#readme) in the infra repository.

### Configuring the webhook for a Github repository

1. On GitHub, open the settings of the repository, then go to "Webhooks" and "Add webhook".
2. Set the following values: 
    - Url: `https://clic.epfl.ch:4000/website`
    - Content type: `application/json`
    - Secret: Found in `/var/secrets`, under `services.webhook.github.secret`
    - SSL Verification: Enabled
    - Events: Depends on when you want the redeployment to be done, but usually "Packages" if there is a docker build in the CI (in that case, don't forget to uncheck "Pushes").
3. Save the webhook

From now on, every time a new version is available, the server will automatically redeploy the service.

## Help I lost access to the server :'(

In the unfortunate case where the server is unreachable, it can be physically accessed at the Lys. See the [section above](#bkmrk-physical-access).

## Help everything broke down.

There is a sheet in the admin shelf in the office with the information to access the backup repository, including the URL, encryption passphrase and credentials for the repository's web interface. Obviously **this sheet should always be present as it is the only way to recover the server's data in case of a critical hardware failure**.

# Services

All the services present on the [server](https://clic.epfl.ch/wiclic/books/it/page/server "Server") or outside.

# Website

The site is developed by hand, using [Directus](https://directus.io) as CMS (content management system).

More information on the [repository](https://github.com/clicepfl/clic-website-v2).

# Nextcloud

### Manually adding files

It is possible to add files directly in the server, by transfering them in the Nextcloud's app volume. The volumes are located under `/var/lib/docker/volumes`, and the files are in the `data/__groupfolders/1/` subfolder of the volume.

To correctly add the files, you may need to convert the filename encoding, the easiest being using [`rsync`](https://linux.die.net/man/1/rsync). For example: `rsync -ahr --info=progress2 --iconv=ISO-8859-1,utf8 /var/gdrive/03_Événementiel/ /var/lib/docker/volumes/nextcloud_nextcloud-app/_data/data/__groupfolders/1/GDrive/03_Événementiel/`.

Once added, you first need to update the files ownership to `www-data` with `chmod www-data:www-data <FOLDER> -R`. Then index them in Nextcloud for them to be available in the web application. To do so, run the command `php ./occ files:scan --all` from the `/var/www/html` directory as the user `www-data` within the Nextcloud's container. The easy way is to get the container's name using `docker ps`, then run `docker exec -it -u www-data <CONTAINER> php ./occ files:scan --all`. This may take a while, so I recommend to use [`screen`](https://linux.die.net/man/1/screen) to start it in background, such that you can close the connexion without stopping the indexing.

### Fixing index.php

After restarting nextcloud, it may happen that the base path of the installation become `/nextcloud/index.php`. In that case, you should run the command `php occ maintenance:update:htaccess` in the nextcloud container when logged in as `www-data`, thus usually something like `docker exec -u www-data nextcloud_nextcloud.<smth> php occ maintenance:update:htaccess` should be sufficient.

### OnlyOffice file size issues

OnlyOffice restricts the maximum size of files that can be edited live by the server. It can be increased in the server's configuration (`default.json` in the `onlyoffice_config` docker volume, full path is `/var/lib/docker/volumes/onlyoffice_config/_data/default.json`), through the `FileConverter.converter.maxDownloadBytes` and `FileConverter.inputLimits.[type=your_file_type].uncompressed` fields.

We have increased the maximum size for PPTX and related files to 512MB, as well as XSLX and related to 300MB.

# SSO - KeyCLIC

The [SSO](https://en.wikipedia.org/wiki/Single_sign-on) (or Single-Sign On) is handled by a [Keycloak](https://www.keycloak.org/) instance hosted on the server. The admin panel is available at [https://clic.epfl.ch/keyclic](https://clic.epfl.ch/keyclic) and users can manage their profile at [https://clic.epfl.ch/me](https://clic.epfl.ch/me).

For now, each user has a `nextcloud_id` attribute, to remain compatible with accounts that were created directly on Nextcloud. New users should have their username as `nextcloud_id`, with the format `{name}.{surname}`. When there will be no remaining users with the `nextcloud_id` different than their `username`, you can update Nextcloud to use the username (`preferred_username`) and get rid of the `nextcloud_id` field.

## Adding new users

Go to the KeyCLIC admin console here: [KeyCLIC Users](https://clic.epfl.ch/keyclic/admin/master/console/#/master/users)

[![](https://clic.epfl.ch/wiclic/uploads/images/gallery/2025-04/scaled-1680-/image-1745950979355.png)](https://clic.epfl.ch/wiclic/uploads/images/gallery/2025-04/image-1745950979355.png)

Click add user and fill in the following information:
- **Required user actions**: Update Password, Verify Email
- **Email verified**: leave this OFF
- **Username**: `name.surname`
- **Email**: EPFL email address if available (may be non EPFL user address for a user who is not at EPFL)
- **First Name** & **Last Name**: you can fill in the user's name, or leave it for them to fill in later
- **Nextcloud ID**: `name.surname`, same as username
- **Groups**: select only the relevant groups for the user, for example members of a commission should only be in their commission group.

Optionally, once the user is created, you can set their password to a temporary value (such as their email address). Leave the "Temporary" option on when creating the password, and ensure the options requiring them to verify their email and update their password are active.
Otherwise, they can set their password by selecting the "Forgot password" option on the KeyCLIC login page.

# Clicketing

Clicketing registration management system, created by CLIC, for CLIC. 

It is available on [https://clic.epfl.ch/clicketing](https://clic.epfl.ch/clicketing), and its codebase on the [GitHub repository](https://github.com/clicepfl/clicketing).


TODO

Possible improvments: 
- [Camipro](https://clic.epfl.ch/wiclic/books/it/page/camipro-api)

# Utility

Various small services and projects for CLIC that are not crucial, but come in handy.

## QR Bill Generator

A handy QR Bill Generator that can be used to generate personnalized bills for event particiapnts. For example, this is used for the [Faculty Diner](https://clic.epfl.ch/wiclic/books/evenementiel/page/souper-de-faculte) and [IC Boost Day](https://clic.epfl.ch/wiclic/books/evenementiel/page/ic-boost-day).

It is hosted at [http://clic.epfl.ch/qrbill-generator](http://clic.epfl.ch/qrbill-generator) and the source code can be found on the [repository](https://github.com/clicepfl/qrbill-generator).

## Mail Sender

A simple mail sender that supports Liquid templates and ICS attachements. It was mainly created to use from Directus flows (that do not support ICS attachements easily). The source code can be found on the [repository](https://github.com/clicepfl/mail-sender).

## Crab CLIC

A self hosted and themed instance of crab.fit. The source code can be found on the [repository](https://github.com/clicepfl/crab.fit).

## KeyCLIC Theme

A simple theming for our self hosted instance of Keycloak. The source code can be found on the [repository](https://github.com/clicepfl/keyclic-theme).

# Roboclic

Roboclic is CLIC's Telegram bot. It is written in Rust and hosted on server.

More information on the [repository](https://github.com/clicepfl/roboclic-v2/#readme).

# IC Plays Pokemon

A collaborative game derived from the concept of [Twitch Plays Pokemon](https://en.wikipedia.org/wiki/Twitch_Plays_Pok%C3%A9mon) (but without the Twitch part). It comes with an interface for players to select a command, then the backend plays the majority command each cycle in the actual Pokemon game. The source code can be found here [IC Plays Pokemon](https://github.com/clicepfl/ic-plays-pokemon).

# Overclicked

Overclicked is a web application created by CLIC, used for tracking and managing orders at student-organized events. It provides simple interfaces for event staff in various roles (at the register, in the preparation area, etc) to monitor incoming orders and update their status in real time. 

It was mainly used for Subsonic, to manage Croque-Monsieur orders in real time.

The source code can be found here: [Overclicked](https://github.com/clicepfl/overclicked)

# Clicketing V1 (outdated)

Clicketing registration management system, created by CLIC, for CLIC. 

> Important Note
> 
> This page is about the first version of Clicketing, which was last used in Spring 2024 and has now been replaced by an entirely new version. You can find the codebase for this older version on the [GitHub repository](https://github.com/clicepfl/clicketing-archived).
> 
> See more about the newest version of Clicketing here : [Clicketing](https://clic.epfl.ch/wiclic/books/it/page/clicketing).

<div style="text-align: center;">
  
[![](https://clic.epfl.ch/bookstack/uploads/images/gallery/2023-11/scaled-1680-/image-1700494660754.png)](https://clic.epfl.ch/bookstack/uploads/images/gallery/2023-11/image-1700494660754.png)
  
</div>

#### How it works

Before an event, Clicketing sends an e-mail to each participant containing a QR Code to facilitate entry. At the start of the event, everyone presents themselves at reception with their QR Code, which staff can scan to confirm registration and attendance.

#### Login

The admin password is stored on the [Vaultwarden](https://clic.epfl.ch/armoire).

#### Utilisation

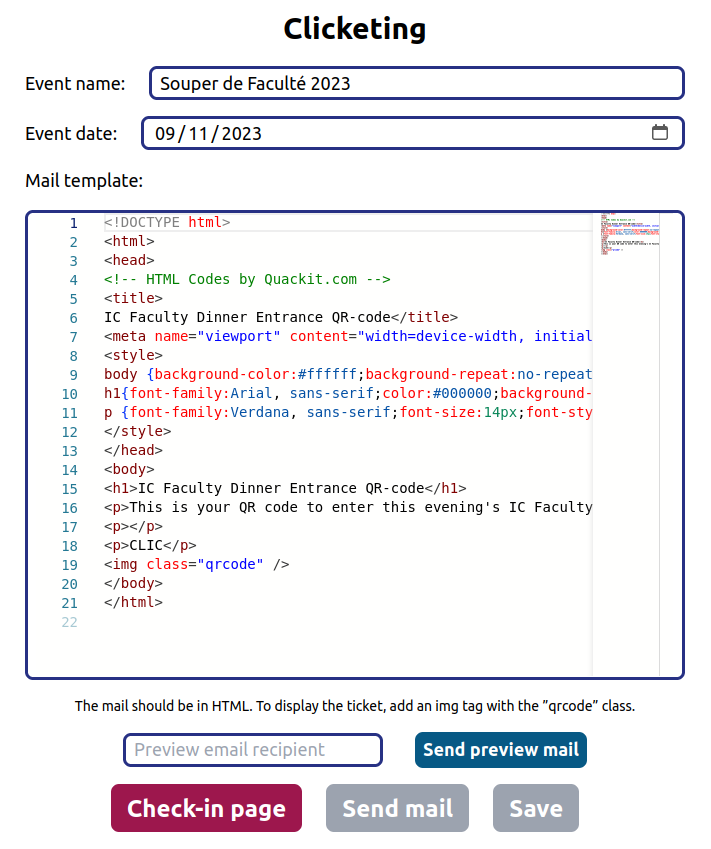
The service allows you to manage registrations by event. On the [main page](https://clic.epfl.ch/clicketing), you can create and edit events. Each event is assigned a name, a date and an e-mail template. 

The mail can be sent to all participants exactly once, using the `Send mail` button. To check the email, you can send it to a specific person, by entering their address in the `Preview email recipient` field and pressing `Send preview email`. This email will contain a random QR Code, and is only to be used to view the visual rendering of the template.

To add participants, you need to use the HTTP API. The ideal way is to create a script on the registration sheet, in order to generate a JSON. For more information, see dev's documentation on the [repository](https://github.com/clicepfl/clicketing).

### Possible improvements
- Use camipro readers instead of QR Code (see [Camipro API](https://clic.epfl.ch/bookstack/books/it/page/camipro-api)).
- Security: Sessions with expiry date.
- Additional data to be inserted in e-mail (name, date, menu, etc.).
- Automatic insertion of participants when registering on form.
- Insert/edit/archive participants (indicate payment, etc.).
- Automatic sending of email upon registration/payment.

# Save the Date

todo update ça

# GA Voting system

To vote at the general assembly of the association, we use Telegram polls.

## Setup

1. Create the GA group. This group should initially only contain the clic-admin user.
2. Create the polls group. Same as above, except that no one else should be added afterwards.
3. On the polls group, prepare all the polls for the GA.
4. Generate the QR Code for the GA group, and place it at the beginning of the GA slides and on each slide where a vote will occur.

## During the GA

The scrutators needs to count the number of voters, and update that number whenever one enters/exits the room.

When a vote starts, the corresponding poll should be forwarded from the polls group to the GA group, and closed when the timer stops. The members holding a procuration will raise their hands to count this second voice. Scrutators must count the number of procurations, sum it up with the poll result and check that it matches the number of voters.

# Rust Workshop

The Rust Workshop is an event organized by the CLIC IT Team to introduce participants to the [Rust Programming Language](https://www.rust-lang.org/). It consist of an overview of the basic syntax of Rust, as well as an explanation of lifetimes, the borrow checker, and various concepts unique to Rust. It is designed to be accessible to any individual who has experience programming in another language, such as Scala or C. No prior experience in Rust is required.

## Resources

The workshop resources include the [slides](https://clic.epfl.ch/nextcloud/s/doFPoPbaPkXnNY3), the [code examples](https://github.com/clicepfl/rust-workshop) that were shown with live explanations, and the [exercises](https://github.com/clicepfl/rust-workshop-exercises), which can ideally be put in individual [playgrounds](https://play.rust-lang.org/) to be more conveniently shared with participants.

## Organisation

### Content

The content of the workshop must be considered and created ahead of time. This includes slides, examples and exercises, as well as any extra material like a cheatsheet. Make sure to think about the time the workshop might take and what sections could be cut if you are running over on time.

### Mediacom

An RITM must be created with Mediacom ahead of time to request a room for the event to take place (make sure to ask for enough spots for the target number of participants, as well as request a projector). The keys for the room lights and the guest camipro to open doors after hours can be picked up on the day.

### Communication

Create a registration form and send out communication (social media, posters) at least a week before the day.

### Setup

- Print cheatsheets
- Bring CLIC glasses
- Buy snacks
- Setup the tables

## Past Editions

### 2025

The workshop was given for the first time to a group of CLIC comittee &amp; commission members and friends, as a first test. There were under 10 participants, so the workshop was given at the CLIC Office from about 13h to 18h, with the projector and tables moved to make space. Depending on the budget, snacks or pizzas could be purchased for the event.

### 2026

For the second edition there were about 35 participants and was given in in CO 016. It lasted around 4h30.

# EPFL Network

On the EPFL network, you are assigned a static IPv6 and a domain accessible for the other user of the network. It changes each time you reconnect. You can get those value [here](https://network.epfl.ch/epnet/dyndns.pl).

This is quite useful to setup temporary servers (e.g. for events) like it was done for the first version of [Overclicked](https://clic.epfl.ch/wiclic/books/it/page/overclicked), where the server was setup on one of the computer used as a register.

# Camipro API

CLIC has obtained access to the API used to identify the owner of a camipro. The API is only available from the EPFL network (either directly or via VPN) and thus not accessible from the server. It may be added to Clicketing's workflow if and only if the key was to be exposed to the client scanning the participants.

Route documentation is available [here](https://mycamipro.epfl.ch/ws/v2/#/Card/get_card__cardid__user). Note: authentication fails from the page or using the displayed command; instead of the header `Authorization`, pass the argument `-u clic` and enter the key.

**For legal reasons**, use of the API is limited to obtaining temporary information. This data **must not be stored** in a database, or any other form of persistent storage. It may only be used to search for a match in a pre-existing database, such as an event registration list.